Helpful Techniques: Chutneys Part One

I know i’ve said it before, but I truly and deeply live for condiments and sauces. Much like the perfect accessory completes an outfit, so to does a wonderful condiment or sauce compliment and finish off a great meal. I will fully admit that I find it super exciting experimenting with interesting sauces or spreads on or in my foods and one that I have quite recently fallen head over heels for are chutneys.
What is a chutney?
Chutneys are a vast and ancient family of condiments that can be dated all the way back to 500 B.C in their simplest forms and originated in Indian cuisine, however they have been adopted by many global cuisines at this point. They can encapsulate flavors ranging from herbaceous, savory, nutty, tart, spicy, or sweet and it is not unusual to find several different varieties often served alongside the same meal. Some chutneys can be found thinner in consistency similar to a dressing or sauce and while some are more akin to a relish. Others are found dry and used as seasoning components for various dishes.
Traditional chutneys can feature a myriad of different ingredients as flavorings such as mint, coriander, peanuts/seeds, tamarind, mango, coconut, chilis, garlic/onion, tomato, vegetables, or even dried fish. Variations that you will find in Western cultures however often focus primarily on combinations of fresh and/or dried fruits that are mixed with vinegar, sugar, and spices and cooked down to a thick, jam-like consistency. In this post, we are going to be focusing on this Western style of chutney, however, I do highly recommend if you are interested checking out other online resources for more information on some of the more traditional styles as well.
Some common fruits that you will often see made into chutneys are mangos, plums, apples, peaches, dates, tamarind and pineapples, however there a very few fruits that would not work well for this preparation. One thing to note though is that softer fruits, such as berries may break down and give you a slightly different texture, however they will still make for a delicious final product.
You “Can” Do This: A Primer For My Chutney Canning Method
Whether reading this headline sent a shiver down your spine or just made you give me an eye roll for my terrible pun, canning can certainly be a daunting task if you’ve never done it before. I personally didn’t grow up learning how to can foods to preserve them, but in my adult years decided I wanted to. When I first started making chutney, I wanted to find a simple way to preserve it and stumbled upon the method I’m about to share…but first…..
DISCLAIMER: I want to preface that this is the method I found works best for me personally FOR THIS PARTICULAR FOOD PREPARATION. I am sharing it because I find it an efficient, effective, and relatively beginner friendly way to safely preserve my chutneys and have never had any issues with it. That being said, this method will not work well for all types of canning. We do plan on going into a more in depth look at canning safety and methods at some point in the future, however if you are looking for more information right now, please check out this helpful link for a beginner’s guide: Canning For Beginners. I will also say here that if you have a method of canning that you prefer and works well for you, please feel free to use what you feel comfortable with instead.
Now that is out of the way, here is my step by step guide to safely and easily canning chutney:
Cleaning your jars and equipment: Cleanliness is extremely important at every step of the canning process, so you will want to take every precaution to make sure your mason jars of choice and any equipment you are going to be using (i.e. ladles, funnels, etc.) are nice and clean. My personal method for this is to run my jars, lids, and rims through my dishwasher, however if that option is not available to you, hot soapy water is perfectly acceptable. Be sure that with either method that your jars and lids are properly rinsed so as no soap or debris is left behind. I highly recommend prepping a few extra jars than when you think you’ll need, just in case.
Sterilize your jars and equipment: Sterilization is key when canning to increase the shelf life of the food you are preserving by insuring any bacteria that might be remaining in or on your hardware is killed. My dishwasher happens to have a setting for sterilization, so I set that up to run after my wash cycle, I also do a secondary sterilization in my oven about 20 minutes before my chutney is finished. To achieve this, I set up my jars, lids, and rims on a clean sheet pan with all the items facing upwards. I also set up a sheet pan with any oven safe tools I am using, such as my metal ladle and funnel. You want to preheat the oven to 200 degrees F. and place your prepared hardware into the oven for at least 20 minutes. Not only does this give extra protection from any bacteria that might be on the hardware, but it also keeps your jars hot, which will help protect you from glass breakage when the time comes to fill them.
Filling and sealing: Once your chutney is at the desired consistency, it is time to fill your jars for storage. This is the moment when you’ll want to remove your jars and tools carefully from the oven and onto a heat safe work space. Be sure you have a sturdy and comfortable oven mitt handy as you will be working while everything is still hot. Very carefully ladle your hot chutney into the hot, sterilized jars, keeping about 1/4 of an inch of space at the top to ensure proper sealing. Take your time to do this step carefully and if you do spill any chutney on the jar, be sure to clean it off thoroughly before sealing the jar. Once all of the jars are filled, place the lid and rim securely on each jar and tighten until just snug. At this point, Iet the jars sit and cool.
Storage: Once the jars are cool enough to handle, I will store them in a cool, dark place (aka my pantry). Usually I check in on them within a few hours or the next morning to make certain all of them sealed properly. To check this, just press on the top of each lid; if the lid is flat against the jar and doesn’t make a popping motion or noise, you are good to go and can keep these safely in your pantry for up to a year! If it didn’t seal properly, don’t fret too much. You can absolutely still use the chutney, however you will have to store it in the fridge and use it within 7-10 days. You can also alternatively store it in a freezer safe container for up to a month.
Final Tips for Chutney Making Success
While the process may seem intimidating, you really can make your own homemade chutneys. Here are a few more quick tips for success:
Organization: Chutney can involve quite a few ingredients and some take more time to prepare than others, so it is really important that before any cooking starts to have all of your ingredients measured and prepped so they are ready for you when it is go time. Same goes for your hardware; be sure to have all of your equipment ready, so when you need it, it’s good to go.
Patience: I often like featuring quick preparations on this blog since it is geared towards the busy modern witch, however, sometimes it is nice to slow things down and take our time to really get the most flavor out of what we are making. Chutney making is a labor of love and while not difficult, it does take some time to get it right. I personally want the final product to be thick enough to coat the back of a spoon (see photo below), so I know it will be a spreadable texture when fully cooled. I have made the mistake at least once to not let my chutney reduce enough and the results were frankly disappointing, so be sure to take your time to get it just the way to want it.

In the same spirit of patience, while you can absolutely enjoy your chutney right after you’ve made it, it is highly recommended to let the flavors meld and mellow for at least 10 days. I know it might be hard to wait, but I promise you that the final product is a great reward!
Be Creative: One of my favorite things about learning the method to make my own chutneys is how creative I can be with them. Some elements are sort of standard, such as the additions of vinegar and sugar, however you can adjust many of the ingredients depending on the season, your mood, or the magickal intention you are looking to infuse into the final product.
Recipe: Cranberry Apple Chutney
Being that the holiday season is right around the corner, my local supermarket finally has fresh cranberries available in the produce section! This felt like the perfect opportunity to make an elevated of the Thanksgiving table staple of cranberry sauce that is sure to add a delicious and magickal twist to your holiday table.

Cranberry Apple Chutney
Ingredients
- 36 oz fresh whole cranberries (strengthening bonds)
- 1 medium sweet onion, chopped (drive off negative energies)
- 5 cloves fresh garlic, minced (healing and warding of negativity)
- 2 small unpeeled, grated granny smith apples *see note
- 2 small granny smith apples, unpeeled and chopped (affection, love)
- 1 cup golden raisins (abundance, luck, celebration)
- 2 lbs light brown sugar (sweeten moods, banish negativity)
- 3 cups apple cider vinegar (boost health, energy, and affections)
- 4 Tbsp orange juice (prosperity, health)
- 2 Tbsp fresh orange peel, diced (prosperity, mood and energy boosting)
- 1 1/2 Tbsp yellow mustard seeds, or to taste (protection, luck)
- 1 Tbsp fresh ginger, diced or grated finely (strength, health)
- 1 whole cinnamon stick (abundance, manifestation)
- 2 tsp red pepper flakes, or to taste (warding off negative energies, protection)
- 2 tsp salt, or to taste (purification, protection)
- 1/2 tsp ground cloves (dispel negativity and strengthen bonds)
- 1/2 tsp ground thyme (clarity, luck)
Instructions
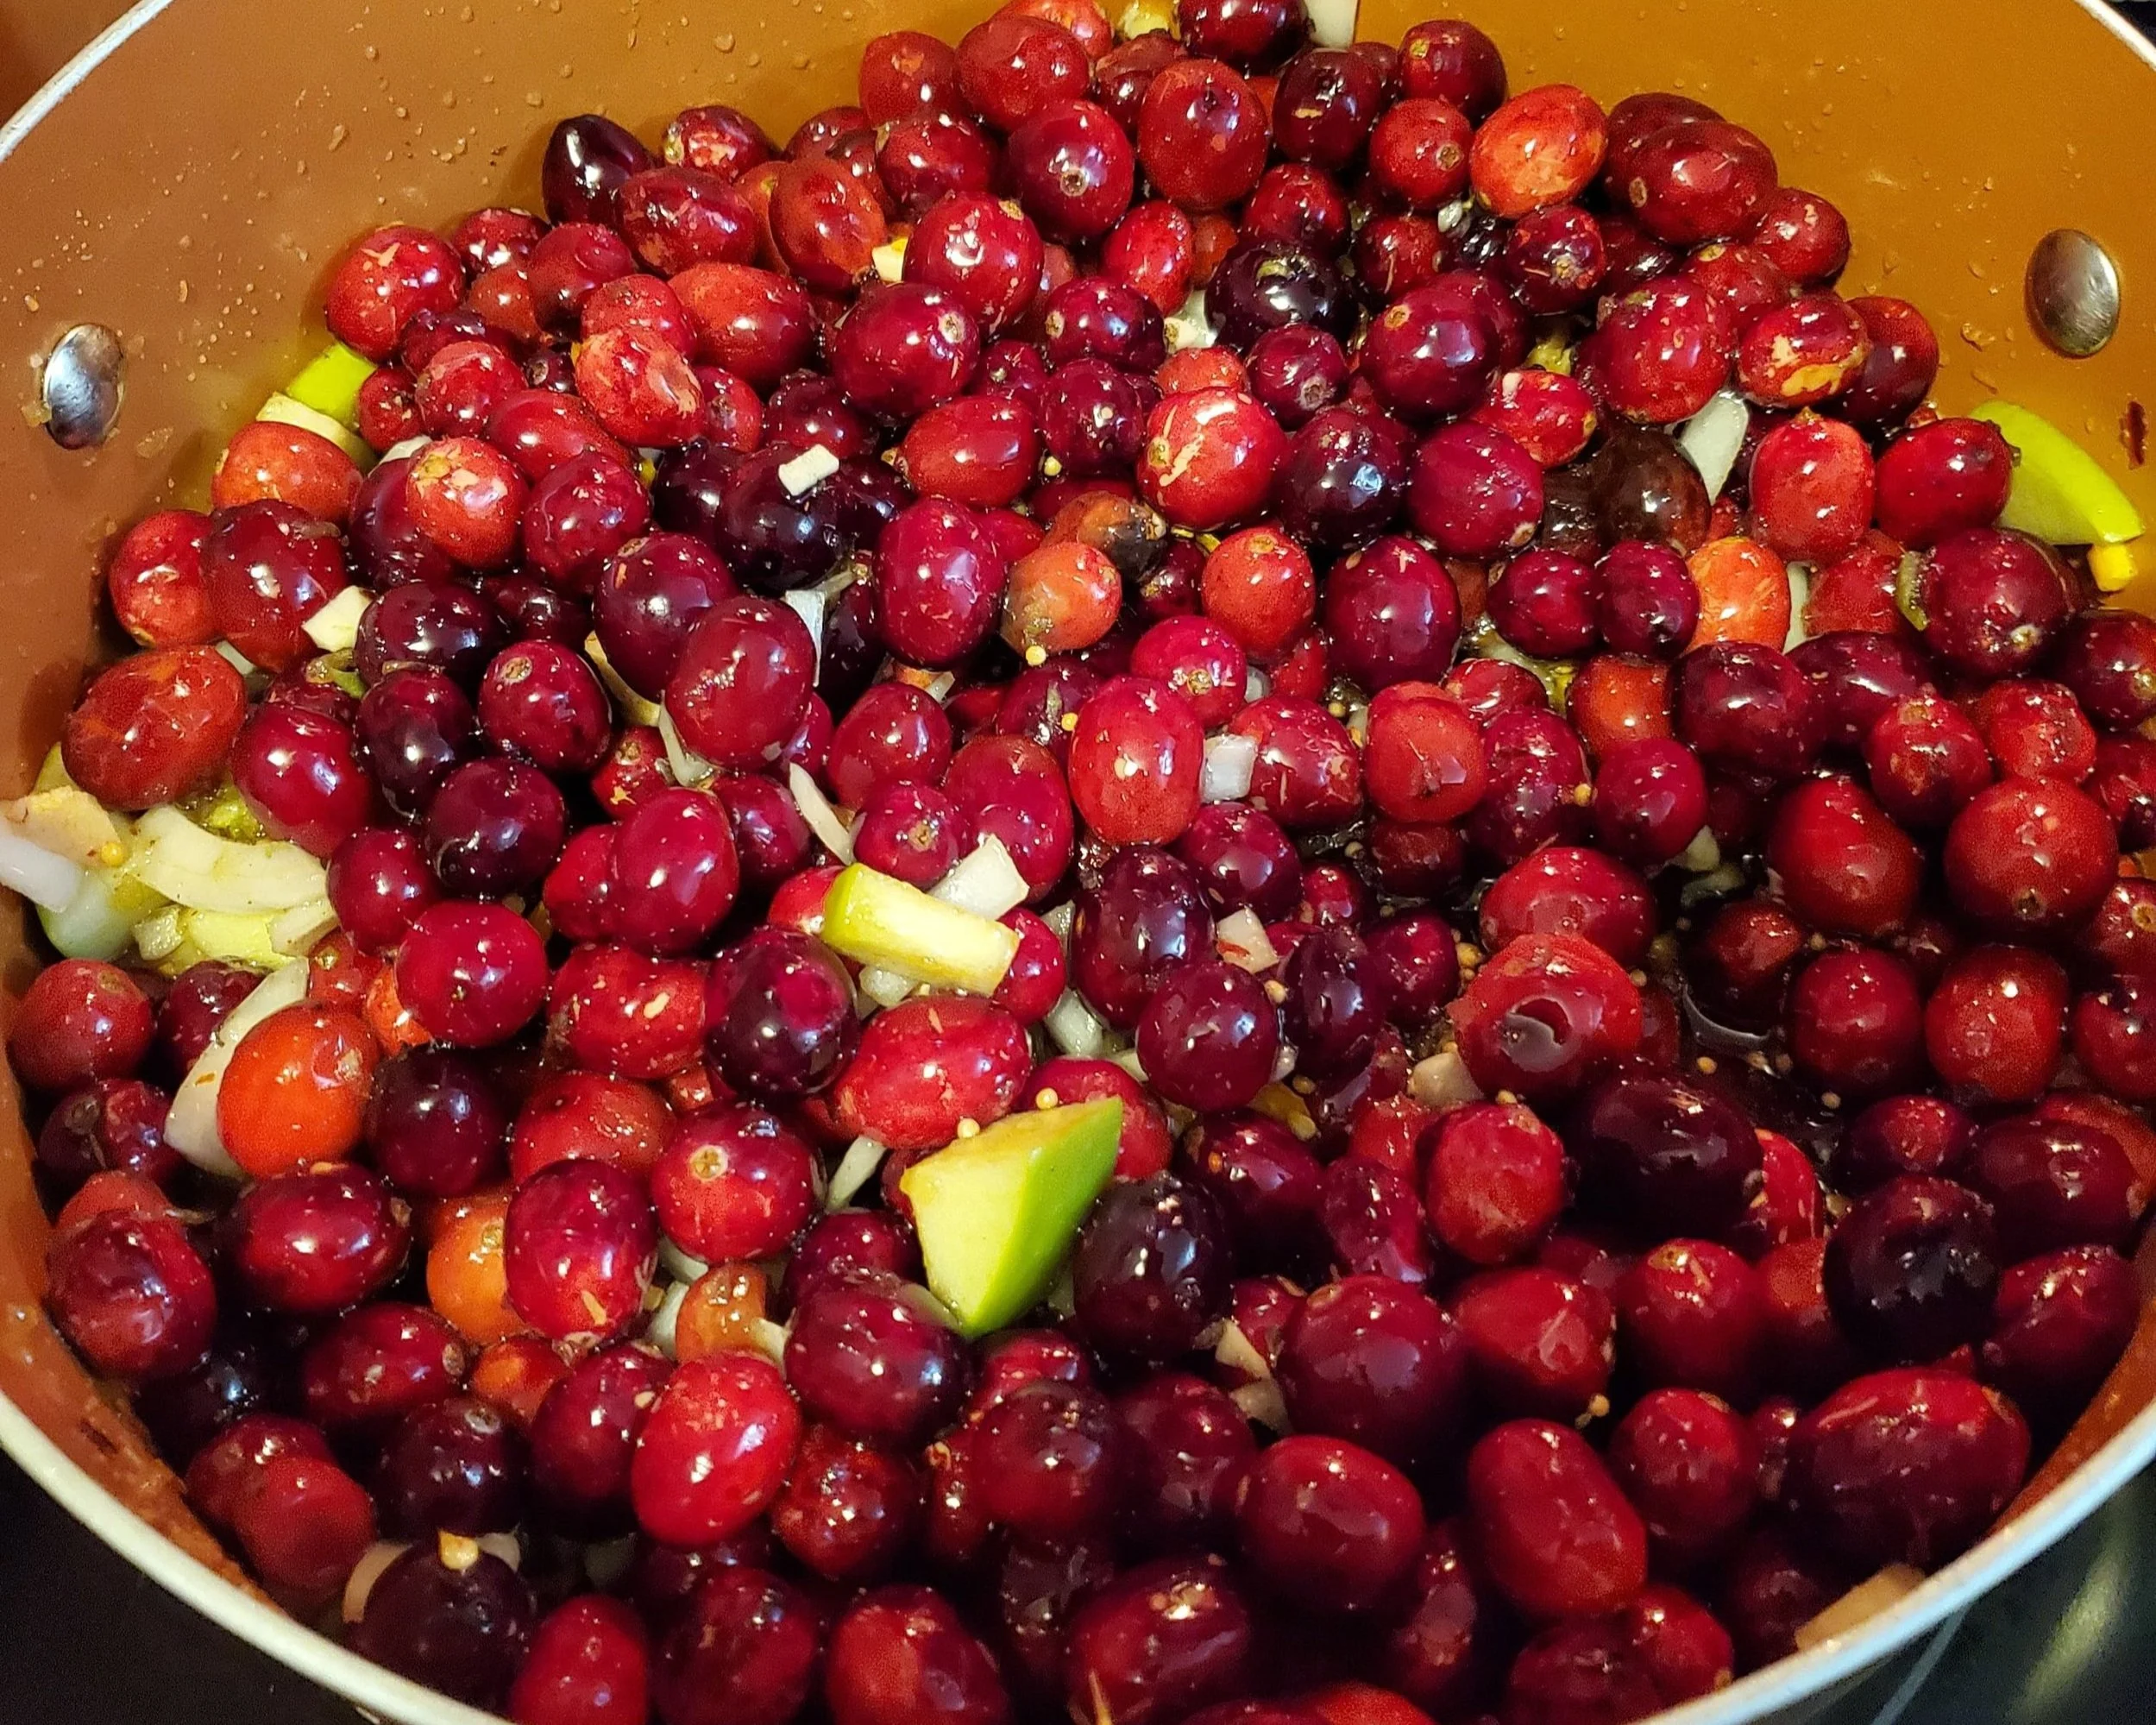
- In a large pot or dutch oven, place all of your ingredients and stir over medium heat until the sugar is dissolved.
- Once the chutney comes up to a boil, bring the heat down to a low simmer.
- Allow the chutney to simmer for 1 to 1 and 1/2 hours uncovered, carefully stirring occasionally to ensure that the mixture does not burn. Be cautious of your hands once as the mixture begins to thicken, as it may bubble and spit out a bit.
- Once chutney has reduced to your liking, remove from heat and store in prepared canning mason jars (see blog post for full canning instructions).
- Once sealed in jars and cooled, store in a dark, cool place for at least 10 days to 2 weeks before using and up to 1 year. Once opened, refrigerate and enjoy within 7-10 of opening.
Notes
- The grated apples in this chutney are to assist in the thickening process due to the high amounts of pectin the granny smith apples.